First of all, I got this pattern from Aunt Grace's Scrapbag by Judie Rothermel. My mom bought it for me a few years ago, and I think that it's out of print and hard to find. I have the fourth special printing that was originally published in 1992. The cover looks like the picture below.
So I'll explain in my own words how I piece the blocks. There is a way to machine-piece these, and this blog shows how to do this: http://whynotsew.blogspot.com/2011/06/twister-block-tutorial.html.
But as for me, I like hand-piecing. It's not as fast, but I like that I can do it while I'm watching a movie without a loud sewing machine going. And I think hexagons are too hard to do by machine,.
But as for me, I like hand-piecing. It's not as fast, but I like that I can do it while I'm watching a movie without a loud sewing machine going. And I think hexagons are too hard to do by machine,.
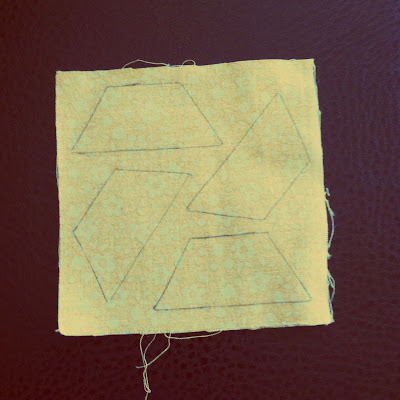
1. First of all, you'll need templates. The white triangles are 1-1/8 inch on all three sides. You'll need to add a seam allowance to that. The trapezoids are 1-1/8 inch on the top (because they need to match up with a triangle) and the longer side is 2-1/4 inches. My template in the picture below has a "B" on it because it's clear plastic and I don't want to lose it.
2. I trace and cut each one out by hand, so that I can get the most mileage out of my scraps as possible. Of course a 1/4" seam allowance is standard, but not all of my pieces get that much because like I said, I'm squishing them onto scraps. But if you want your blocks to be more sturdy, you'll need to make sure you get a big enough seam allowance. Trim the points of the triangles and trapezoids, it makes it easier when piecing together.
3. You'll need 6 trapezoid and triangle pieces for each "mini" block.
4. Match up the points at the end of where you're going to stitch with a pin.
 |
| back view |
6. Do a back-stitch. Put your needle in the same hole as the second-to-last stitch and pull through. (picture below) This just makes your block more sturdy. You could do it at the beginning of the block too if you want to be extra careful.
7. Tie a knot, and press your piece. Always press to one side, not open. And make sure you press all the pieces to your mini block the same way. It just looks better.
8. Make 6 of these triangle+trapezoid pieces.
Stay tuned for more! If any of this doesn't make sense, please let me know in the comments.
Here are past posts about the Kansas Twister pattern:


2 comments:
It totally makes sense :) Hopefully I'll get the guts to make this someday, it's just so perfect.
Maaaaby one day I will try blanket making :p Probably when the girls are all in school and I have time which i am lacking right now.
Post a Comment