Wednesday, June 26, 2013

Kansas Twister Tutorial Part 3


Here is how to join the mini blocks together into one big block. Each full block needs seven mini blocks of the same color. See what I mean about the pin wheels all going the same direction?

1. Grab two blocks and put them right side together. It's easiest if you start with the center mini block and go around in a circle. Make sure that you are sewing the right seams together, because there's 6 sides to each mini block remember.
2. You have to make sure to pin in the middle again this time so that the points of the little white triangles will match up. I'm kind of a perfectionist so this is important to me.
3. With the first two mini blocks, you'll only have to sew one side together. But for the rest, you'll have to sew two sides together. And then 3 sides on the last mini block. When you have to sew more than one side, don't tie a knot at the end of each seam. Just push the needle through to the next side. (Make sure the second side matches up).
4. Now you have a full block! See what I mean about the points of the little white triangles matching up?

*************************************************
If you missed Parts 1 and 2 of the tutorial, here they are!

http://lexichan.blogspot.com/2013/06/kansas-twister-tutorial-part-1.html
http://lexichan.blogspot.com/2013/06/kansas-twister-tutorial-part-2.html

************************************************
Here's an real antique version of the Kansas Twister quilt if you wanted to arrange the pinwheels this way. Just an idea.

Click HERE

*************************************************

Sister Mommies featured my blog post! Check it out!
http://sistermommies.wordpress.com/2013/06/26/mommies-that-inspire-alexa-price/

Friday, June 21, 2013

Kansas Twister Tutorial Part 2

1. Now that you have six triangle+trapeziod pieces, it's time to piece them together. We're going to do this three pieces at a time. At this point, decide which way you want your pinwheels (or "twisters") to face. Mine are going the same direction as the Judie Rothermel ones. But I wasn't paying attention a couple of times, and those pinwheels ended up going the wrong direction and I had to start all over again. Unless you want your quilt to be a little quirky, compare each new block to the block you made previously.
2. Make sure you're drawing the template on the back of the fabric.

3. Make sure none of the seam allowances are sewn down. This will make it easier for pressing later.
4. Once you have two sets of three, you need to sew them together.
5. Pinning the middle point is crucial if you want your points to look good. This took me a little bit of practice, but I like hand-piecing for this reason because it's slower and I can check my progress and go back much easier. Remember to pin the end of each seam too, like in the first tutorial.
6. If you've been pressing all of your pieces the same direction, it's super easy to press the finished block. The center seam will almost look like a circle.
7. You've finished one mini block! You'll need 7 of these mini blocks in the same color for the main blocks. See how the points match up?

Let me know if you have nay more questions.

Here's the link to part 1 if you missed it:

Wednesday, June 19, 2013

Kansas Twister Tutorial Part 1

First of all, I got this pattern from Aunt Grace's Scrapbag by Judie Rothermel. My mom bought it for me a few years ago, and I think that it's out of print and hard to find. I have the fourth special printing that was originally published in 1992. The cover looks like the picture below. 


So I'll explain in my own words how I piece the blocks. There is a way to machine-piece these, and this blog shows how to do this: http://whynotsew.blogspot.com/2011/06/twister-block-tutorial.html.
But as for me, I like hand-piecing. It's not as fast, but I like that I can do it while I'm watching a movie without a loud sewing machine going. And I think hexagons are too hard to do by machine,.


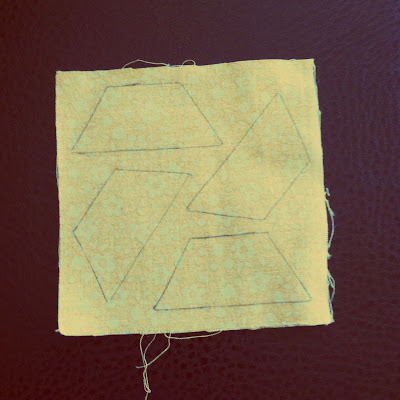
1. First of all, you'll need templates. The white triangles are 1-1/8 inch on all three sides. You'll need to add a seam allowance to that. The trapezoids are 1-1/8 inch on the top (because they need to match up with a triangle) and the longer side is 2-1/4 inches. My template in the picture below has a "B" on it because it's clear plastic and I don't want to lose it.

2. I trace and cut each one out by hand, so that I can get the most mileage out of my scraps as possible. Of course a 1/4" seam allowance is standard, but not all of my pieces get that much because like I said, I'm squishing them onto scraps. But if you want your blocks to be more sturdy, you'll need to make sure you get a big enough seam allowance. Trim the points of the triangles and trapezoids, it makes it easier when piecing together.

3. You'll need 6 trapezoid and triangle pieces for each "mini" block.

4. Match up the points at the end of where you're going to stitch with a pin.
back view
5. Stitch along the line. Make sure that you're stitching along the line on the back too.

6. Do a back-stitch. Put your needle in the same hole as the second-to-last stitch and pull through. (picture below) This just makes your block more sturdy. You could do it at the beginning of the block too if you want to be extra careful.

7. Tie a knot, and press your piece. Always press to one side, not open. And make sure you press all the pieces to your mini block the same way. It just looks better.


8. Make 6 of these triangle+trapezoid pieces.

Stay tuned for more! If any of this doesn't make sense, please let me know in the comments.

Here are past posts about the Kansas Twister pattern:

Friday, August 19, 2011

DIY Capes

Supplies:
  • 2 yards of fabric per capem one yard of each color;
  • 1 package of extra wide, double fold bias tape (1 package will make 2 capes);
  • Sewing machine and thread;
  • Chalk or fabric marker;
  • String, yarn, or thread
  • Scissors
Photobucket
Directions:
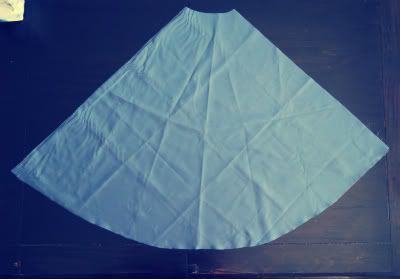
  1. Fold each piece of fabric in half. To mark the curved cutting lines, tie one end of a string to a fabric marker or chalk. Hold the other end of the string to the top corner of the fabric at the fold. Pull string taut, and draw the curve of the cape. Do this at the neck line and at the hemline. Cut along the chalk lines. Repeat for other fabric.
  2. Unfold the fabrics and pin right sides together. Using the sewing machine, sew around the outside edges and bottom of the cape, using a 1/2-inch seam allowance. Clip on seam allowance at the corners. Do not sew the neckline.

  3. Photobucket
  4. Reach in through the neckline and turn the cape right side out. Iron cape at this point to make edges crisp.
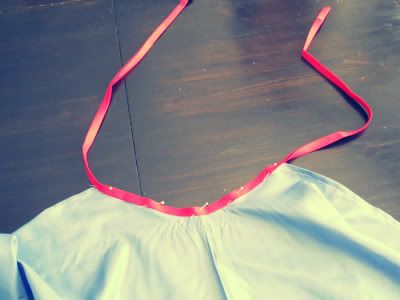
  5. Cut the length of bias tape in half, creating two pieces of the 54" bias tape. Mark the middle of the bias tape and the middle of the neckline. Match the center marks and pin the bias tape around the neckline, leaving equal room on both sides for the ties. Sew the bias tape from one end to the other closing the
Photobucket
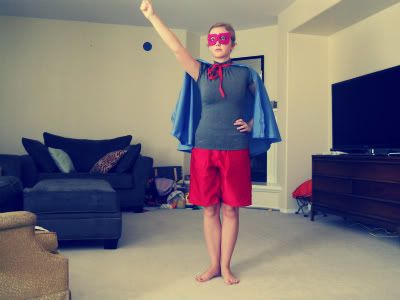
Please don't judge my outfit. Or the fact that the cape and mask don't fit me. Now go make some capes of your own for a little boy's superhero birthday party. Or for your own personal enjoyment.

Tuesday, July 26, 2011

And Sew It Begins

Photobucket
Remember the post I did a while ago? Click HERE. Well, I finally ordered some fabric. And I didn't get the $20/yd brocade from eBay. Instead, I went with this very very dark purple brocade from fashionfabrics.com. Much more affordable. They had some brocades at Joanne's the other day but they were mostly Chinese dress fabrics. Which I didn't want. So I was very pleased with the fabric when it came in the mail.
Photobucket
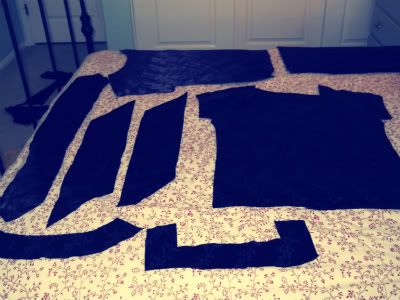
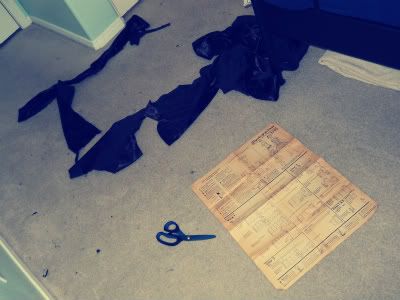
It took me forever to cut out because I was being super careful. And I had just enough fabric. I'm so happy because the dress pattern is exactly for my size, and all the pieces were already cut out. I'm having a fun time guessing who used this pattern and for which dress, and what fabric they used...was it for a dance? Or just for fun? Are they still alive? Haha jk. The pattern's not that old. But my favorite part is that the pattern and instructions smell like an old book. That's seriously one of my favorite smells. Kindles kill off that smell :( Anyways, let's see if I can figure out my sewing machine, because it's different from my mom's and I haven't really used it for a big project like this. I'm no sewing queen, so a lot of this is an adventure to me. I will keep the dress progress updated.